Walletbeat contributor guide for wallet data entry
This guide aims to help you contribute wallet data to Walletbeat. If you’d like to contribute to some other aspect of Walletbeat, see CONTRIBUTING.md.
Development setup & workflow
Before you can contribute wallet data to Walletbeat, you need to make a copy of the site and its data and be able to run it on your computer so you can make changes. Please read the contributor setup guide guide if you need help with this. The rest of this guide assumes you have already set up a Walletbeat development environment.
Wallet data changes
In Walletbeat, data about wallets is called wallet feature data (or equivalently: wallet features). These are defined in such a way that they are all objective, observable information about a wallet’s behavior or code. Therefore, your core task when contributing wallet data is to test a wallet and dive into its code to fill in the wallet feature data for the wallet you are testing.
Using Claude Code skills
If you use Claude Code, you can use the following skills to get interactive, step-by-step guidance instead of following this guide manually:
/wallet-create [wallet-name]— use this when adding a wallet that does not yet exist in Walletbeat. It walks you through Steps 1–2: entity file, contributor file, wallet skeleton, and site registration./wallet-update [wallet-name]— use this when the wallet already exists and you want to populate or update its feature fields. It walks you through Step 3: filling innullfields with values and refs.
Both skills cross-reference each other, so if you land on the wrong one you will be pointed in the right direction.
Walkthrough assumptions
In this walkthrough, we will assume the following:
- You are rating a software wallet that Walletbeat does not have existing data on, named My Little Wallet and developed by Big Wallet Corporation LLC.
- My Little Wallet has a browser extension version and a mobile version, but not a desktop version.
- Your online nickname is Chain Monkey and this is your first time contributing to Walletbeat.
- You work for Big Wallet Corporation LLC.
Step 0: Become familiar with the wallet data directory structure
Wallet data is located in the top-level /data directory. All files are written in TypeScript, which helps to ensure their validity and conformance. The /data directory has the following layout. We will go over each of these in detail in this guide.
/data
├── contributors          ← You will need to add a file here
│   ├── 0xh3rman.ts         if this is your first time contributing!
│   ├── example.ts        ← Use this as an example.
│   ├── gabrielkerekes.ts
│   ├── jiojosbg.ts
│   └── [...]
├── eips                  ← You do not need to touch this.
├── entities              ← Data about entities related to wallets
│   ├── ackee.ts            (wallet development companies, security auditors,
│   ├── ambire.ts           RPC providers, transaction simulation services,
│   ├── biconomy.ts         bundlers, swap quote services,
│   ├── binance.ts          hardware wallet manufacturers, etc.) all goes here.
│   ├── cantina.ts
│   ├── certik.ts
│   └── [...]
├── software-wallets      ← Data about software wallets goes here.
│   ├── ambire.ts           You will most likely add or edit a file in this
│   ├── elytro.ts           directory!
│   ├── rabby.ts
│   ├── [...]
│   ├── metamask.ts
│   ├── unrated.tmpl.ts   ← If adding a new software wallet, copy this file as template.
│   └── [...]
├── software-wallets.ts   ← The list of all known software wallets goes here.
├── hardware-wallets      ← Data about hardware wallets goes here.
│   ├── bitbox.ts           Same idea as software wallets.
│   ├── cypherock.ts
│   ├── firefly.ts
│   ├── gridplus.ts
│   ├── unrated.tmpl.ts   ← If adding a new hardware wallet, copy this file as template.
│   └── [...]
├── hardware-wallets.ts   ← The list of all known hardware wallets goes here.
├── embedded-wallets      ← Data about embedded wallets goes here.
├── embedded-wallets.ts   ← The list of all known embedded wallets goes here.
├── wallet-contracts      ← Data about smart wallets' smart contracts goes here.
│   ├── ambire-account.ts
│   ├── metamask-7702-delegator.ts
│   └── [...]
└── wallets.ts            ← You do not need to touch this.
There is also a directory of wallet icons at /public/images/wallets.
How /data fields are encoded
Fields in /data must be written down. When you add a new property to a wallet, entity, or contributor type, it must be required — not omitted, not undefined, and not marked optional with ?.
Use these three states:
nullmeans “we have not researched this yet.”- A named sentinel (
NO_WEBSITE,NO_AFFILIATION,NO_LOCK_MECHANISM, …) or an empty array means “we checked; there is none / it does not apply.” - A concrete value means “we know what it is.”
This is why searching /data for null finds incomplete research. Omitted fields are invisible.
Examples:
features.security.publicSecurityAudits: null— we have not looked up audits yet.[]— we looked; the wallet has never been audited.Entity.url: { type: 'NO_WEBSITE' }— this organization has no website. Do not leaveurloff the object.Contributor.affiliation: 'NO_AFFILIATION'— this person has no wallet-development affiliation. Do not use[]or omit the field.WalletMetadata.coinspectId: { type: 'NO_COINSPECT_ID' }— Coinspect does not list this wallet.nullmeans we have not checked yet.
This applies to wallet features, entities, contributors, and new wallet metadata fields. Some older WalletMetadata / WalletUrls properties are still optional (pseudonymType?, urls?, hardware-only fields); treat those as legacy and do not add more of that shape.
Step 1: Add a new wallet’s basic information to Walletbeat
Step 1.1: Add an entry for the wallet development entity behind My Little Wallet
- Create a copy of
/data/entities/example.tsat/data/entities/big-wallet-corp.ts, then remove all constants from this file other thanexampleWalletDevelopmentCompany. Rename it tobigWalletCorpand fill in the details. - Find an SVG icon of Big Wallet Corp LLC, and crop all the transparent edges out of the SVG. Save it as
/public/images/entities/bigWalletCorp.svg(the filename matches theidfield).- (If you cannot find an SVG version of the icon, find a PNG or JPG version instead, crop it similarly, save it as
/public/images/wallet/bigWalletCorp.pngor/public/images/wallet/bigWalletCorp.jpg, and seticon.extensionto'png'or'jpg'in the wallet data file. If you do this, you need to set theicon.widthandicon.heightfields as well.)
- (If you cannot find an SVG version of the icon, find a PNG or JPG version instead, crop it similarly, save it as
You should now have something like this at /data/entities/big-wallet-corp.ts:
import type { CorporateEntity, WalletDeveloper } from '@/schema/entity'

export const bigWalletCorp: CorporateEntity & WalletDeveloper = {
	id: 'bigWalletCorp',
	name: 'Big Wallet Corp',
	legalName: { name: 'Big Wallet Corp LLC', soundsDifferent: false },
	type: {
		chainDataProvider: false, // ← Change to `true` if Big Wallet Corp LLC also provides chain data RPC services. You will also need to add `& ChainDataProvider` to the bigWalletCorp type.
		corporate: true,
		dataBroker: false,
		exchange: false,
		offchainDataProvider: false,
		securityAuditor: false,
		transactionBroadcastProvider: false, // ← Change to `true` if Big Wallet Corp LLC also provides transaction broadcast RPC services. You will also need to add `& TransactionBroadcastProvider` to the bigWalletCorp type.
		walletDeveloper: true,
	},
	crunchbase: 'https://www.crunchbase.com/organization/bigwalletcorp',
	farcaster: { type: 'NO_FARCASTER_PROFILE' },
	icon: { extension: 'svg' },
	jurisdiction: 'Atlantis',
	linkedin: 'https://www.linkedin.com/company/bigwalletcorp/',
	privacyPolicy: 'https://bigwalletcorp.com/privacypolicy',
	repoUrl: 'https://github.com/bigwalletcorp', // NOT the wallet repository!
	twitter: 'https://x.com/bigwalletcorp',
	url: 'https://bigwalletcorp.com/',
}
Step 1.2: Add yourself as a contributor and enter your affiliation details
Create a copy of /data/contributors/example.ts at /data/contributors/chain-monkey.ts. Fill in the details.
As an employee of Big Wallet Corp LLC, you have any affiliation to a wallet development company. This needs to be disclosed in the affiliation field.
You should now have something like this at /data/contributors/chain-monkey.ts:
import type { Contributor } from '@/schema/wallet'
import { bigWalletCorp } from '@/data/entities/big-wallet-corp'

export const chainMonkey: Contributor = {
	name: 'Chain Monkey',
	affiliation: [
		{
			developer: bigWalletCorp,
			hasEquity: true,
			role: 'EMPLOYEE',
		},
	],
}
Step 1.3: Add a skeleton wallet entry for My Little Wallet
- Create a copy of
/data/software-wallets/unrated.tmpl.tsat/data/software-wallets/my-little-wallet.ts. - Rename the top-level object from
unratedTemplatetomyLittleWallet. - Change all
metadata.*fields such asid(set to'myLittleWallet'),displayName,lastUpdated(set to today’s date inYYYY-MM-DDformat),urls, etc. - Find an SVG icon of the wallet and crop all the transparent edges out of the SVG. Save it as
/public/images/wallet/myLittleWallet.svg(the filename matches themetadata.idfield).- (If you cannot find an SVG version of the icon, find a PNG or JPG version instead, crop it similarly, save it as
/public/images/wallet/myLittleWallet.pngor/public/images/wallet/myLittleWallet.jpg, and setmetadata.iconExtensionto'png'or'jpg'in the wallet data file.)
- (If you cannot find an SVG version of the icon, find a PNG or JPG version instead, crop it similarly, save it as
- Set yourself as the sole contributor in
metadata.contributors. - Update the
variantsfield to the set of versions that the wallet has. In this case, since My Little Wallet has a browser extension version and a mobile version, you would set[Variant.MOBILE]and[Variant.BROWSER]totrue, and remove the[Variant.DESKTOP]field.
At the end of this process, you should have something that looks like this at /data/software-wallets/my-little-wallet.ts:
// [... imports, including:]
import { chainMonkey } from '@/data/contributors/chain-monkey'

export const myLittleWallet: SoftwareWallet<AttributeGroupId> = {
	metadata: {
		id: 'myLittleWallet',
		displayName: 'My Little Wallet',
		tableName: 'My Little Wallet',
		coinspectId: null,
		contributors: [chainMonkey],
		iconExtension: 'svg',
		lastUpdated: '2077-01-01',
		urls: {
			docs: ['https://mylittlewallet.com/docs'],
			extensions: ['https://mylittlewallet.com/extensions'],
			repositories: ['https://mylittlewallet.com/repo'],
			socials: {
				discord: 'https://discord.com/mylittlewallet',
				farcaster: 'https://farcaster.xyz/mylittlewallet',
				linkedin: 'https://linkedin.com/mylittlewallet',
				telegram: 'https://telegram.org/mylittlewallet',
				x: 'https://x.com/mylittlewallet',
			},
			websites: ['https://mylittlewallet.com'],
		},
	},
	features: {/* Do not touch this part yet; this comes in later steps. */},
	variants: {
		[Variant.MOBILE]: true,
		[Variant.BROWSER]: true,
		// Removed the "Variant.DESKTOP" line, because My Little Wallet has no desktop version.
	},
}
Step 1.4: Add the wallet to the list of known software wallets
For the wallet to be shown on the site, it needs to be listed in /data/software-wallets.ts. Import your wallet and update the softwareWallets object as follows:
 import { type RatedWallet, rateWallet } from '@/schema/wallet'

 import { ambire } from './software-wallets/ambire'
 import { elytro } from './software-wallets/elytro'
 // [... other wallets...]
+import { myLittleWallet } from './software-wallets/my-little-wallet'  // ← Add!

 /** Set of all known software wallets. */
 export const softwareWallets = {
 	ambire,
 	elytro,
 	// [... other wallets...]
+	myLittleWallet, // ← Add!
 }
Step 2: Get the website up and running with the new wallet displayed
You have now added the wallet to Walletbeat’s database. You can now run:
# Apply consistent formatting:
$ pnpm fix

# Verify that you did everything right:
$ pnpm check:all
# If it complains, fix it until it passes.

# Finally, run the site locally:
$ pnpm dev
# [...]
 astro  v5.15.2 ready in 1655 ms

┃ Local    http://localhost:4321/
┃ Network  use --host to expose
You can now browse the site at http://localhost:4321/. You should now see the wallet you added displayed in the comparison table. Of course, everything will be marked “unrated” at first (shown in gray).
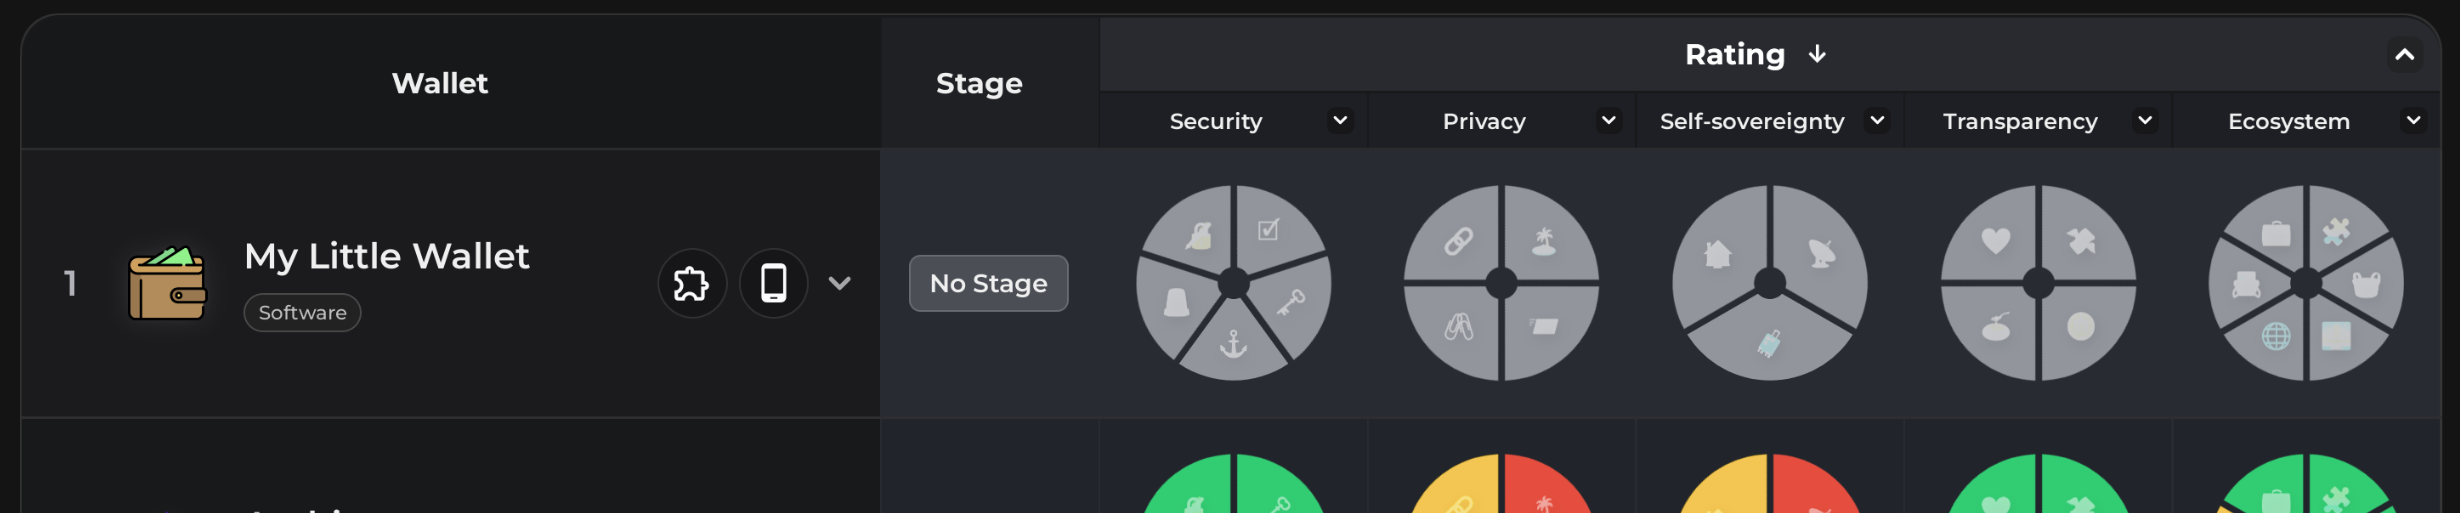
You are now ready to iterate on populating the wallet data.
Step 3: Populate wallet data
From the template that you copied earlier, you may have noticed that every field inside the features object is set to null. null values in features field always mean “unknown”. Initially, everything about the wallet is unknown, so everything is set to null. Your goal as a wallet data contributor is to get rid of as many nulls as you feel confident you can populate.
The general workflow to populate a null field with some real data is as follows:
- Look up what the field represents. The best source of information for this is usually the documentation on the type definition for that field.
- Test the wallet yourself or inspect its code to determine the value that the field should have.
- Write that value in the wallet data file, usually accompanied by a reference (
ref, more on this later). - Refresh the wallet rating page and observe whether this new data has turned any of the wallet attributes into states other than “unrated”.
- Move on to the next feature field and repeat until there are none left.
Some fields are more complicated to populate than others. For this guide, we will walk through populating three fields with various degrees of complexity.
Example field A: (easy) Multi-address support (features.multiAddress)
This example walks through the use of the VariantFeature and Support types, which are used by nearly every feature field.
This field relates to whether or not the wallet lets you use multiple addresses. It is a simple yes/no question.
In your code editor, you should be able to click (perhaps Control+Click or one of the right-click options, depending on your editor) on the multiAddress field inside the wallet data file to jump to the type definition of this multiAddress field. Use this technique to figure out how a type is defined:
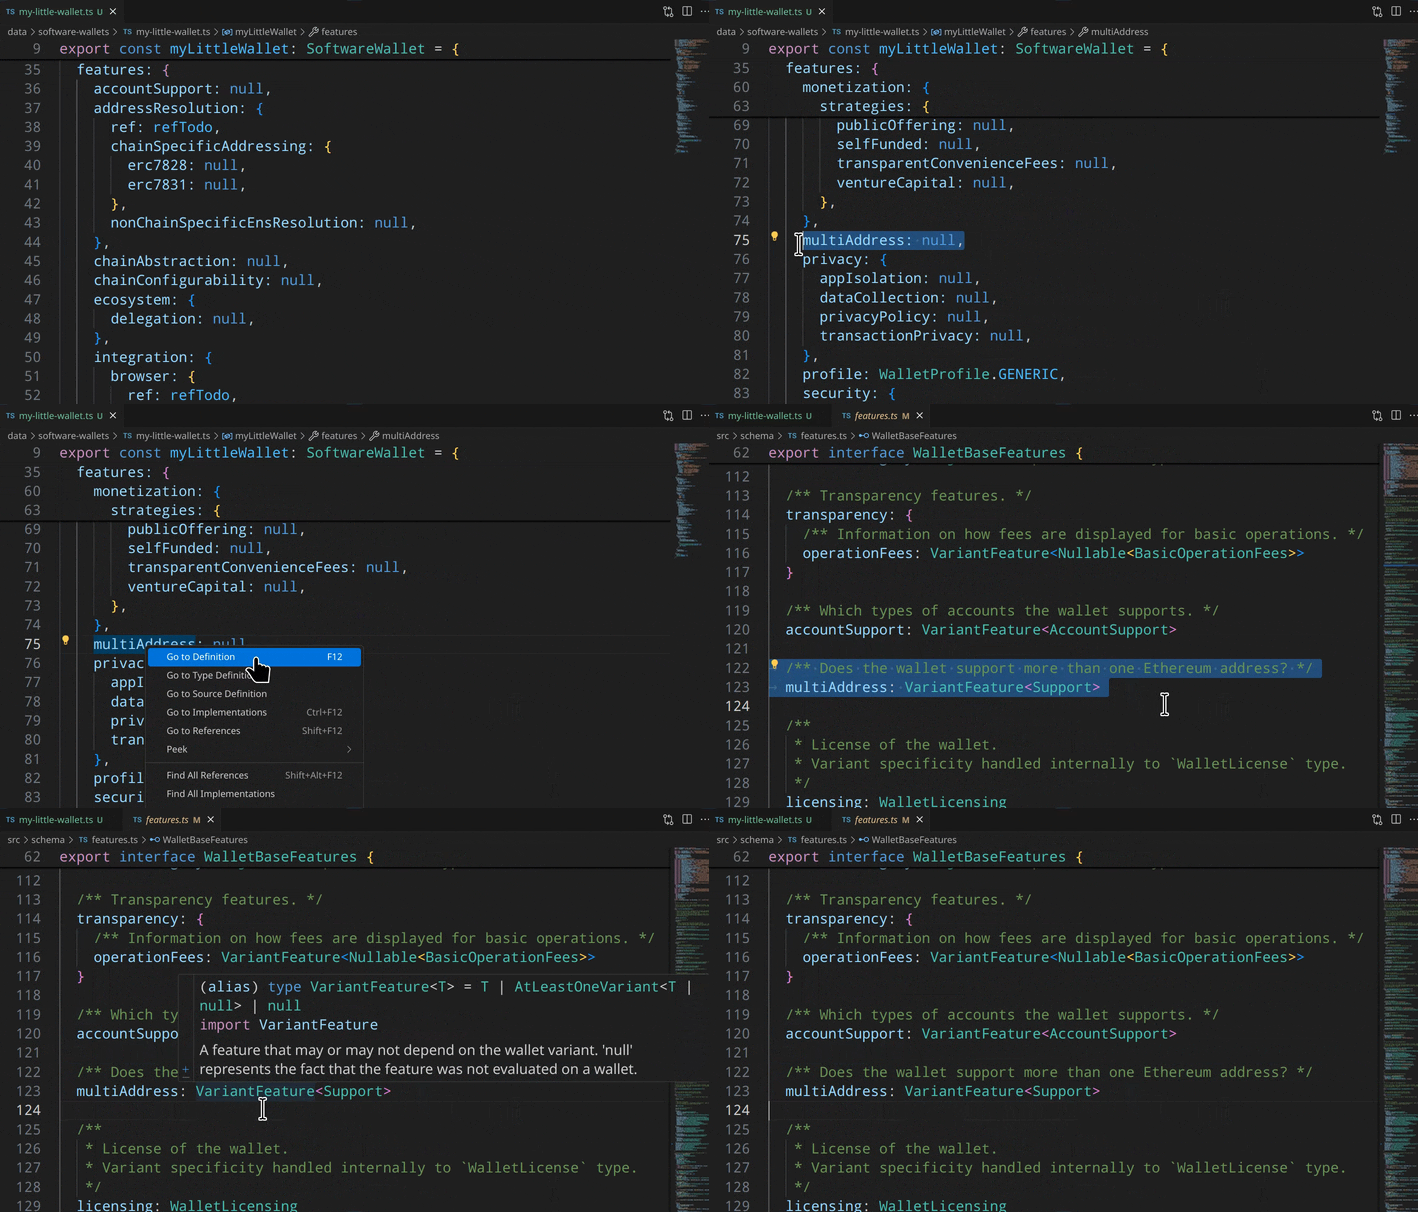
This brings you to:
export interface WalletBaseFeatures {
	// [...]

	/** Does the wallet support more than one Ethereum address? */
	multiAddress: VariantFeature<Support>

	// [...]
}
VariantFeature<T> is a wrapper type you will see nearly everywhere when editing wallet data. It allows you to specify a value one of two ways:
- Either using a value directly:
export const myLittleWallet: SoftwareWallet<AttributeGroupId> = {
	// [...]
	features: {
		multiAddress: /* Some value here */,
	},
}- Either using one value per wallet variant, i.e. different values for each variant the wallet has. In this case, this would be a different value for the browser version and the mobile version.
export const myLittleWallet: SoftwareWallet<AttributeGroupId> = {
	// [...]
	features: {
		multiAddress: {
			[Variant.BROWSER]: /* Some value for the browser version here */,
			[Variant.MOBILE]: /* Some value for the mobile version here */,
		},
	},
}
For this example, let us assume that:
- The browser version of My Little Wallet does support multiple addresses.
- The mobile version of My Little Wallet does not support multiple addresses.
You would then use:
import { featureSupported, notSupported } from '@/schema/features/support' // Needed imports

export const myLittleWallet: SoftwareWallet<AttributeGroupId> = {
	// [...]
	features: {
		multiAddress: {
			[Variant.BROWSER]: featureSupported,
			[Variant.MOBILE]: notSupported,
		},
	},
}
The featureSupported and notSupported constants describe whether a feature is supported or not. In this case, multi-address is supported on the browser version but not on mobile.
If you are confused about how to populate an attribute, you can also always look at another wallet that has the field defined in order to see how that wallet has it. In this case, here is the same field for Ambire (/data/software-wallets/ambire.ts):
export const ambire: SoftwareWallet<AttributeGroupId> = {
	// [...]
	features: {
		// [...]
		multiAddress: featureSupported,
	},
	variants: {
		[Variant.BROWSER]: true,
	},
}
This means that Ambire only has a BROWSER version, and that this version supports using multiple addresses.
Once you have populated features.multiAddress for My Little Wallet, you may notice that nothing may have changed on the wallet rating page. Why is this? Because multi-address support is not an attribute that Walletbeat rates wallets for. Instead, it acts as input for other attributes that Walletbeat does rate wallets for.
For example, the Multi-Address Privacy attribute only considers wallets that support multiple addresses in the first place to verify that they do not leak the correlation between two of the user’s addresses. Rating logic:
- If the wallet does not support multiple addresses, then multi-address correlation risk does not exist; therefore, the wallet is exempt from being rated on this attribute, and you will see the pie slice disappear from the wallet rating page.
- If the wallet does support multiple addresses, then Walletbeat needs additional information to verify whether or not the wallet leaks the correlation between multiple addresses. This is populated in the
features.privacy.dataCollectionfield, which you will populate later. As it is not populated yet, the pie slice will remain unrated (gray) for now.
Example field B (medium): Chain configurability (features.chainConfigurability)
This example walks through the use of the WithRef and Nullable types, which are used by many feature fields. It also uses the VariantFeature and Support types explained in the previous example.
Let’s look at the features.chainConfigurability type definition:
export type WalletSoftwareFeatures = WalletBaseFeatures & {
	// [...]

	/** Level of configurability for chains. */
	chainConfigurability: VariantFeature<Support<WithRef<Nullable<ChainConfigurability>>>>

	// [...]
}
This looks complicated; let’s take it on type at a time. We have a combination of the following wrapper types:
VariantFeature, which we’ve already seen in the previous example.Support, which we’ve also seen in the previous example but now with a type parameter. We’ll see this later.WithRef, which adds a reference (ref) field for you to explain the source for the wallet information contained in this field. We’ll also see this later.Nullable, which allows subfields to be partiallynullin case not all information is known. This means any subfield inChainConfigurabilitymay be set tonullif you are unsure. (Note that from a final wallet rating perspective, the entirefeatures.chainConfigurabilityfield will be entirely ignored so long as any of its subfields isnull.)ChainConfigurabilityis where the actual data specific to thefeatures.chainConfigurabilityfield is defined. Let’s take a look (/src/schema/features/self-sovereignty/chain-configurability.ts):
/**
 * Customization options that exist for chains.
 */
export interface ChainConfigurability {
	/** Does the wallet support using Ethereum L1 at all? */
	l1: Support<SingleChainConfigurability>

	/** Does the wallet support non-L1 Ethereum chains? */
	nonL1: Support<SingleChainConfigurability>

	/** Does the wallet support adding custom chains? */
	customChainRpcEndpoint: Support
}
This is an object with 3 fields: l1, nonL1, and customChainRpcEndpoint.
customChainRpcEndpoint is a straightforward Support type, which we’ve already discussed in the previous example. It can be set to either featureSupported or notSupported.
Let’s turn to l1 and nonL1, which are both of type Support<SingleChainConfigurability>. This means they can either be set to notSupported, or to supported({ /* ... */ }) where the contents of the object in brackets is of type SingleChainConfigurability. This Support<T> wrapper type is often used for features where Walletbeat needs data (T) that only makes sense to populate if a feature is supported in the first place. For example, if a wallet only supports the L1 chain, then it would be impossible to say whether or not the wallet allows configuring the RPC endpoint of non-L1 chains.
Let’s look at SingleChainConfigurability now:
/** Can the wallet's usage of a particular chain be configured? */
export interface SingleChainConfigurability {
	/** Can the wallet's RPC endpoint for the chain be configured? */
	rpcEndpointConfiguration: RpcEndpointConfiguration
}
This is a simple type with a single field (rpcEndpointConfiguration) which can be set to any of the following enum values:
/**
 * Can a chain's RPC endpoint be configured, and if so, when?
 */
export enum RpcEndpointConfiguration {
	/**
	 * It is possible to set a custom RPC endpoint address before the wallet
	 * makes any sensitive request to its default RPC endpoint setting.
	 *
	 * "Sensitive request" is defined as containing any user data, such as the
	 * user's wallet address.
	 */
	YES_BEFORE_ANY_REQUEST = 'YES_BEFORE_ANY_REQUEST',

	/**
	 * It is possible to set a custom RPC endpoint address, but the wallet makes
	 * sensitive requests to its default RPC endpoint before the user has a
	 * chance to get to the configuration options for RPC endpoints.
	 *
	 * "Sensitive request" is defined as containing any user data, such as the
	 * user's wallet address.
	 */
	YES_AFTER_OTHER_REQUESTS = 'YES_AFTER_OTHER_REQUESTS',

	/** The RPC endpoint is not configurable by the user. */
	NO = 'NO',
}
Putting all these together, let’s write the value for the features.chainConfigurability for My Little Wallet. In practice, your task here would be to try out the wallet’s browser and mobile version. You need to find a way to configure the chain, and determine whether this is possible before the wallet makes any request to that chain’s RPC endpoint (we cover network traffic analysis later).
For the sake of this example, we will assume that:
- Chains are not configurable at all in the mobile version.
- The browser version does not allow configuring the L1 chain.
- The browser version allows modifying non-L1 chains’ RPC endpoint before any request to those RPC endpoints is made.
- The browser version allows adding RPC endpoints for custom chains.
// Needed imports:
import { featureSupported, notSupported, supported } from '@/schema/features/support'
import { RpcEndpointConfiguration } from '@/schema/features/self-sovereignty/chain-configurability'
import { refTodo } from '@/schema/reference'

export const myLittleWallet: SoftwareWallet<AttributeGroupId> = {
	// [...]
	features: {
		chainConfigurability: {
			[Variant.BROWSER]: supported({
				ref: refTodo, // Explained later
				l1: notSupported,
				nonL1: supported({
					rpcEndpointConfiguration: RpcEndpointConfiguration.YES_BEFORE_ANY_REQUEST,
				}),
				customChainRpcEndpoint: featureSupported,
			}),
			[Variant.MOBILE]: notSupported,
		},
	},
}
Last field here to populate is the ref field, which is part of the WithRef<T> wrapper type. ref contains one or more References, which are one or more URLs that can also come with custom labels and explanations. These are displayed on the Walletbeat site for all attributes that rely on this particular feature data.
Here’s an example of how you could populate the ref field:
import { featureSupported, notSupported, supported } from '@/schema/features/support'
import { RpcEndpointConfiguration } from '@/schema/features/self-sovereignty/chain-configurability'

export const myLittleWallet: SoftwareWallet<AttributeGroupId> = {
	// [...]
	features: {
		chainConfigurability: {
			[Variant.BROWSER]: supported({
				ref: [
					// Reference 1: Support article about configuring chains in My Little Wallet.
					{
						// URL of the reference.
						url: 'http://support/bigwalletcorp.com/how-do-i-configure-chains',

						// Label (the text of the clickable link that goes to the URL):
						label: 'Support page about chain configuration',

						// Markdown explanation as to why this reference is relevant.
						explanation:
							'My Little Wallet provides L1-only chain configurability, as documented in its support article.',
					},

					// Reference 2: Source code of the chain configuration feature.
					{
						url: 'http://github.com/bigwalletcorp/my-little-wallet-browser-version/master/src/chain-config.ts',
						label: 'Source code for chain configuration',
						// No `explanation` needed here, the link text is already fairly self-evident.
						// The site will display the link only without explanation text.
					},
				],
				l1: notSupported,
				nonL1: supported({
					rpcEndpointConfiguration: RpcEndpointConfiguration.YES_BEFORE_ANY_REQUEST,
				}),
				customChainRpcEndpoint: featureSupported,
			}),
			[Variant.MOBILE]: notSupported,
		},
	},
}
Alternatively, you may use ref: refTodo as a placeholder for references that you have not yet gathered. You can also use refNotNecessary for references that are self-evident. For example, Walletbeat tracks whether a wallet supports Safe multisigs. It is obvious that Safe Wallet supports them, so ref: refNotNecessary would be appropriate there, but this would not be obvious for other wallets.
Some feature fields use MustRef<T> instead of WithRef<T>. For such features, you must provide at least one reference; refTodo and refNotNecessary will not work. This is used for features where the reference link itself is part of the inherent information to collect. For example, security audits must be accompanied with a ref to the audit report itself.
In some rare cases, TypeScript’s type inference for the supported(...) object does not infer the correct type. If this happens, it may be necessary to explicitly specify its type parameter, like this:
export const myLittleWallet: SoftwareWallet<AttributeGroupId> = {
	// [...]
	features: {
		chainConfigurability: {
			// `supported<T>(...)` satisfies `Support<T>`.
			[Variant.BROWSER]: supported<WithRef<ChainConfigurability>>({
				// Same fields as before...
			}),
		},
	},
}
Now that you have populated the features.chainConfigurability field, the Self-Hosted Node attribute will light up on the wallet rating!
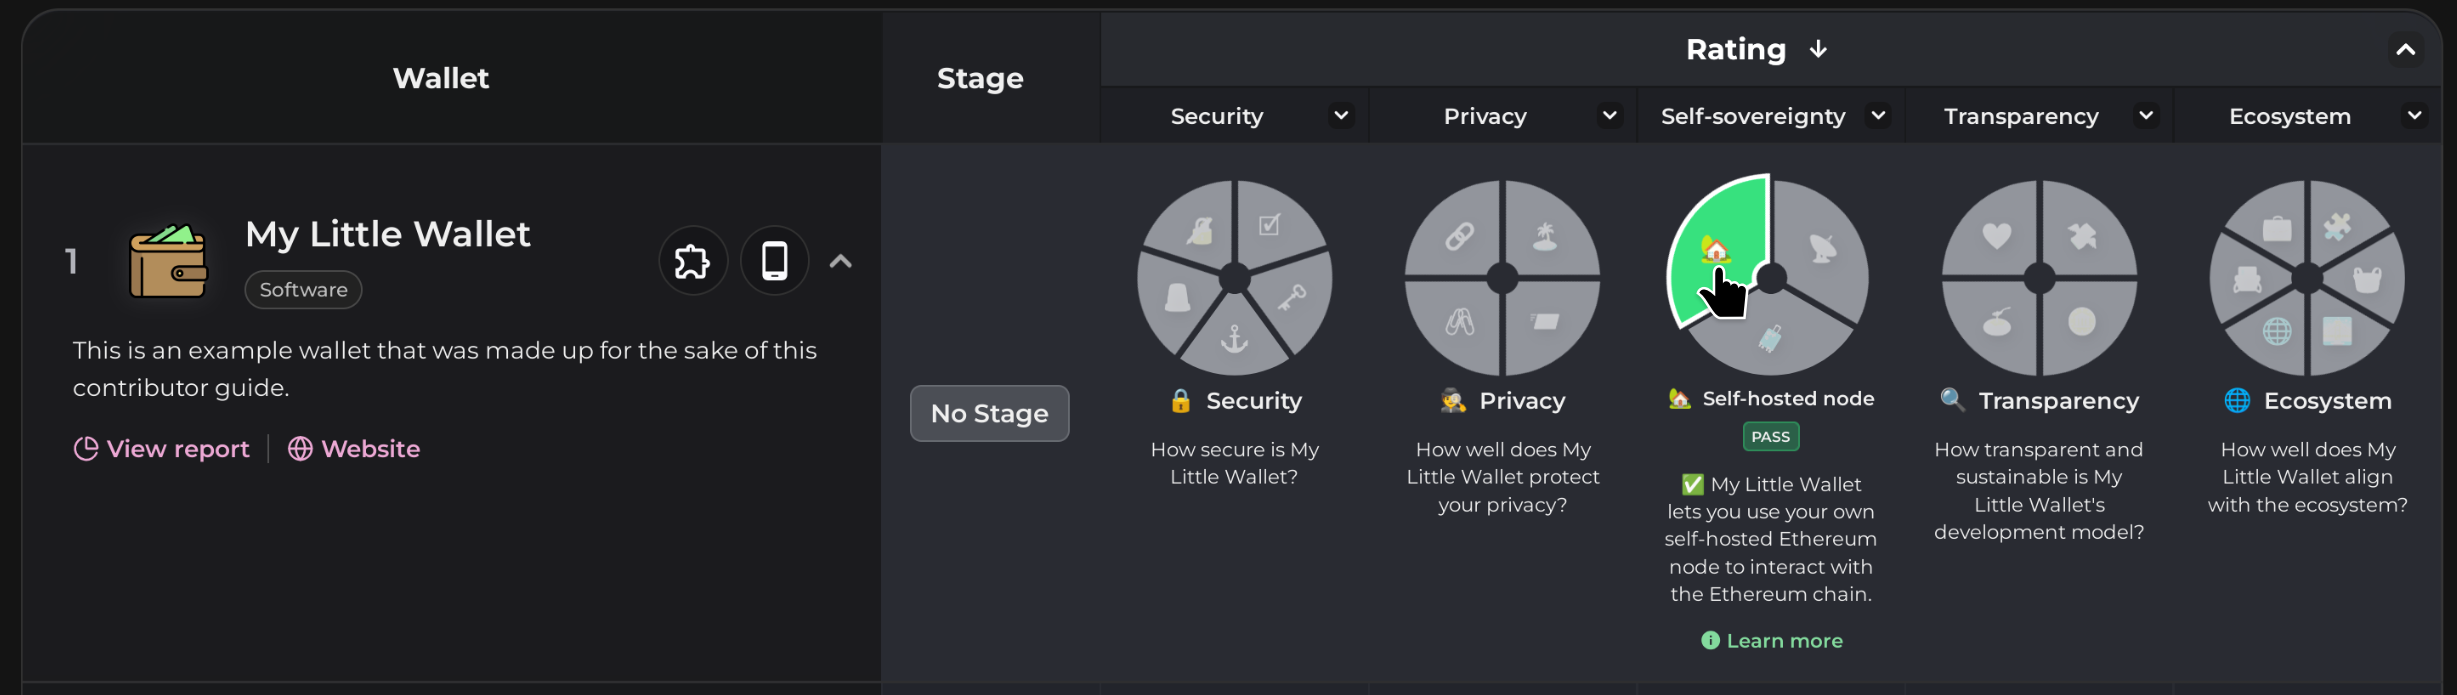
You can also see the detailed rating along with your ref links on the wallet page:
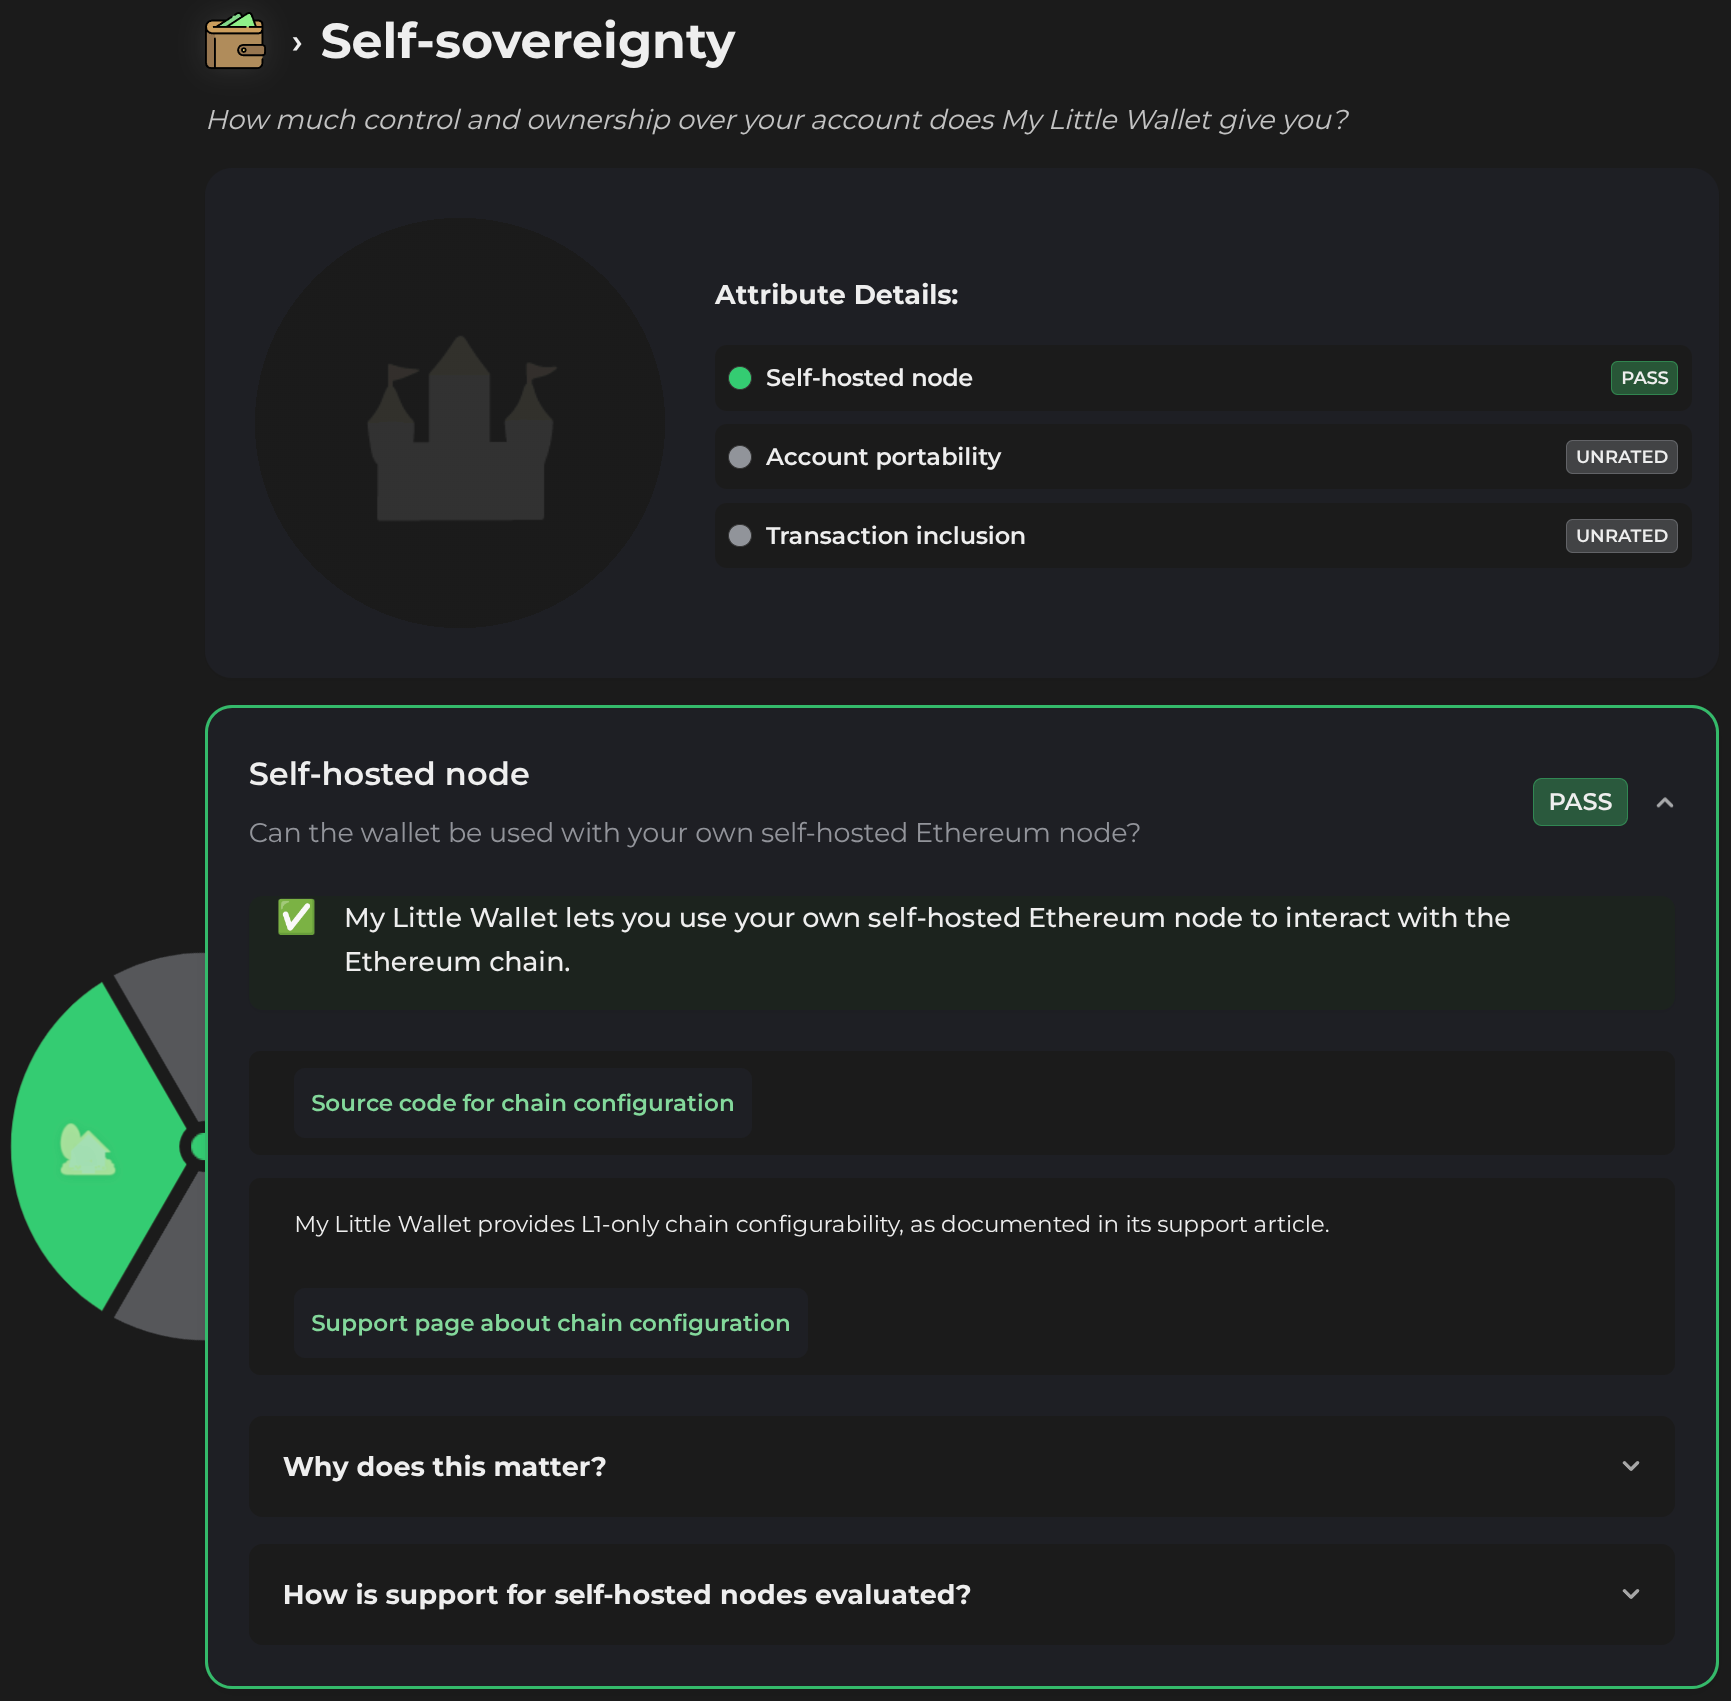
This feature field is also used in other attributes such as Chain Verification, but these other attributes need yet more feature data before they can produce a rating.
Example field C (difficult): Data collection (features.privacy.dataCollection)
This is likely the most laborious field that Walletbeat collects about wallets, but one of the most important inputs for privacy attributes. The features.privacy.dataCollection field collects information on all the network requests that wallets make to external servers.
In order to collect this information, you will need to set up your computer and your wallet to be able to capture the network traffic created by the wallet and to analyze this traffic. This is covered in a separate guide at /resources/docs/wallet-testing/data-collection/data-collection.md, which also covers how to populate the wallet feature data accordingly once you have the data.
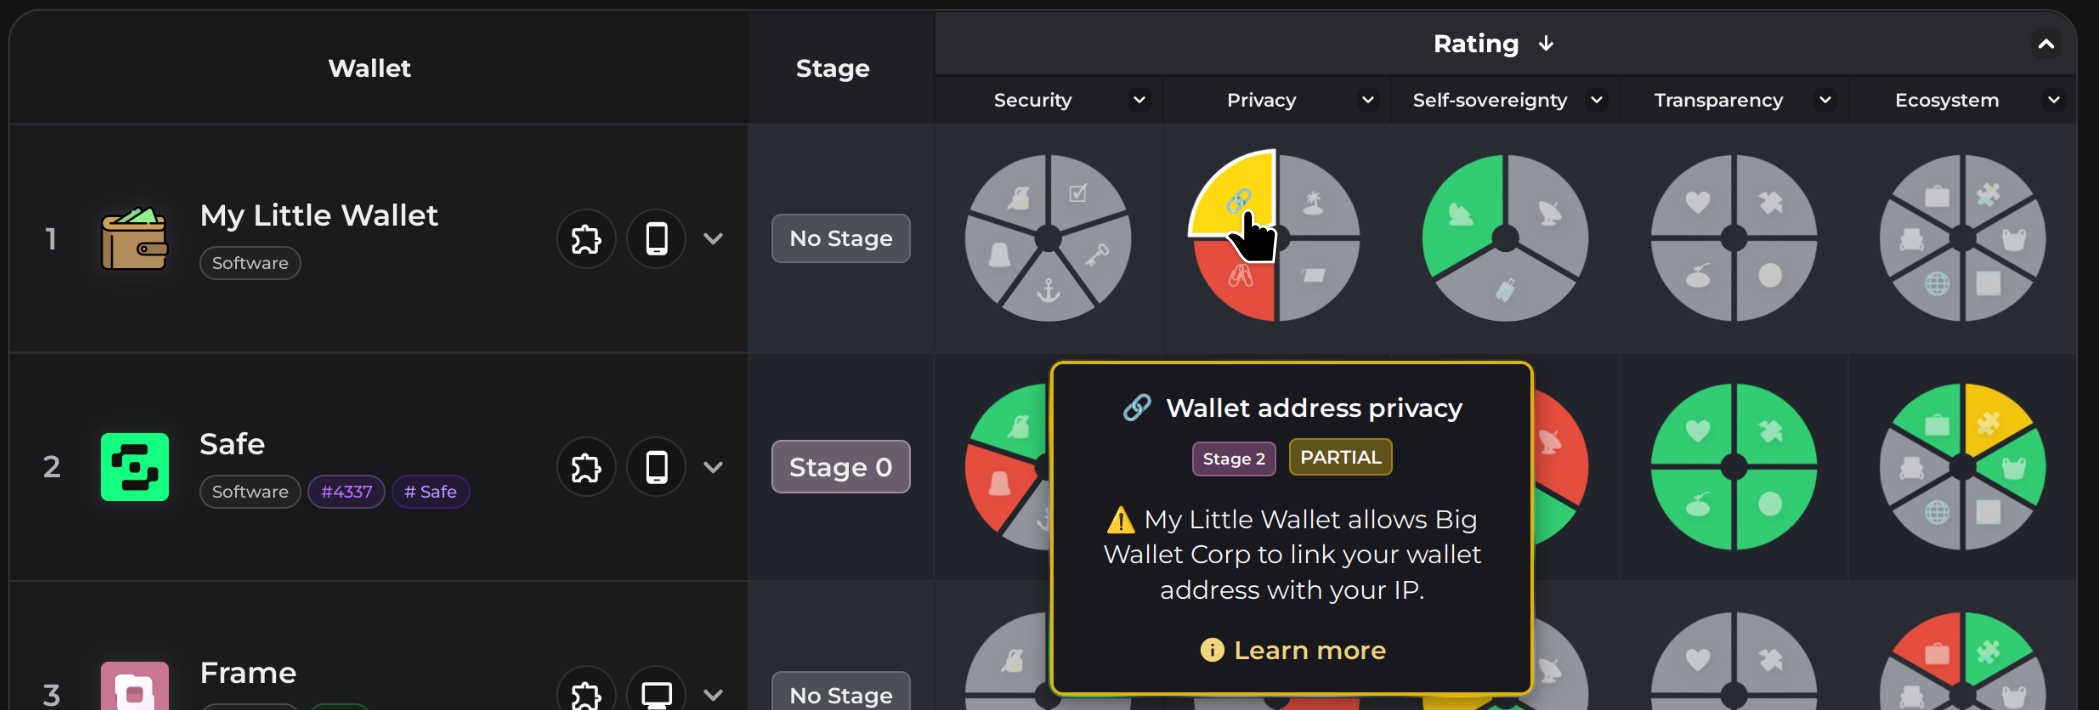
After you have populated this data, you should see attributes that rely on this data (such as the Address Privacy and Multi-Address Privacy) attributes become populated! (This data is also used by the Orderflow Transparency attribute, but that one needs more feature data still.)
Step 4: Send a PR to Walletbeat and get it merged
Once you have added or updated wallet data, it is time to send a PR (Pull Request) on GitHub with your contributions. See the corresponding section on the /CONTRIBUTING.md guide for instructions on this.
Once the PR is merged, you are done!
🫡 Thank you for contributing to Walletbeat and making the wallet ecosystem stronger! 🫡